

If your laptop has a removable external battery, you can almost certainly replace it yourself in under ten minutes. For most modern laptops with internal, built-in batteries, a certified technician is the safer call. That’s the short answer. The longer one involves knowing exactly which battery you need, where to buy it without getting burned by a counterfeit, and how to handle the swap without frying your motherboard.
Before you touch anything: run a battery health report, write down your laptop’s model number and the battery’s part number, back up your data, and power the machine completely off. Those four steps protect you regardless of which route you take.
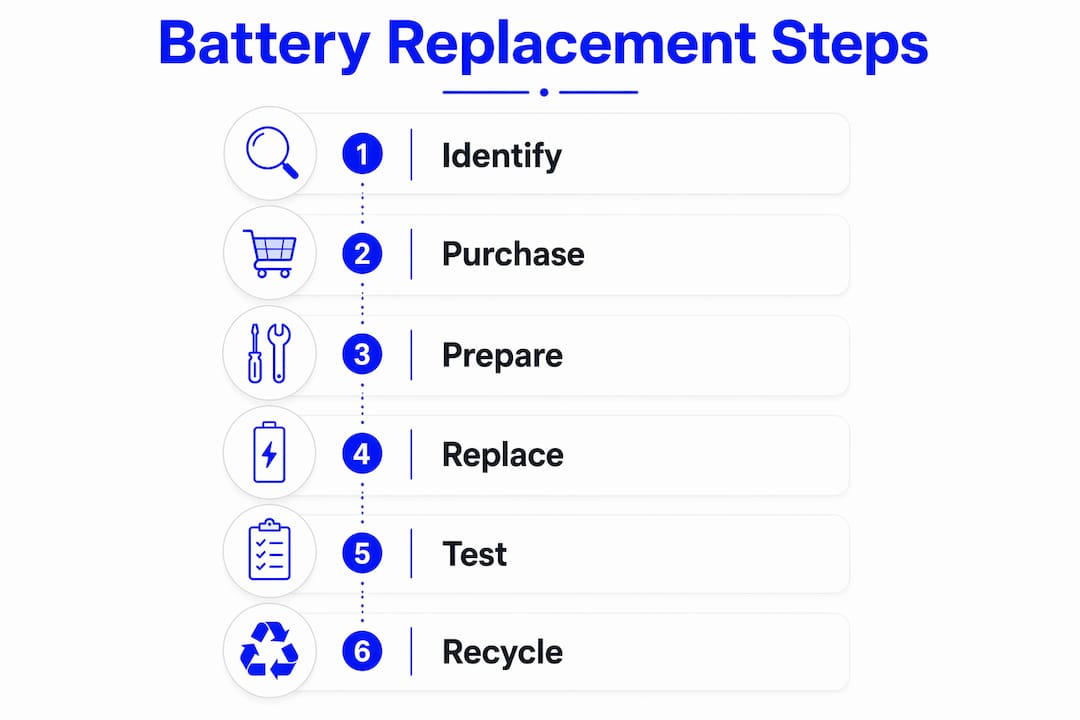
The sections below walk through every piece of that process, from identifying the right part to safe disposal of the old one.
Table of Contents
- How do you identify the correct replacement battery?
- Where can you buy a replacement battery in the U.S.?
- OEM vs. aftermarket batteries: which should you choose?
- How much does a replacement battery cost, and how long will it take?
- Can you replace a laptop battery yourself? A quick decision checklist
- Step-by-step: replacing a removable laptop battery safely
- Step-by-step: replacing an internal laptop battery
- Battery safety, disposal, and recycling in the U.S.
- How to check battery health and recalibrate after replacement
- Warranty, returns, and red flags when buying a battery
- When should you book a certified repair vs. do it yourself?
- Key Takeaways
- The part most people skip (and why it matters)
- Skip the guesswork: Kronnos-technology handles battery replacement for you
- Useful sources and manufacturer resources
How do you identify the correct replacement battery?
Getting the wrong battery is the most common and most avoidable mistake. Voltage mismatches can damage charging circuits; a connector that’s one millimeter off won’t seat properly. Here’s what to capture before you order anything.
Where to find your numbers:
- Model number: underside sticker on the laptop, or in Settings > System > About (Windows) or Apple menu > About This Mac (macOS).
- Battery part number: printed on the battery label itself. On removable batteries, pop the pack out and read the label directly. For internal batteries, check your OEM’s support page using the model number.
- System info path (Windows): open Command Prompt and run
powercfg /batteryreport. The HTML report shows design capacity, full charge capacity, and cycle count. - System info path (macOS): hold Option and click the Apple menu, then go to System Information > Power to see cycle count and condition.
Specs you must match exactly:
- Part number (the safest compatibility check)
- Voltage (V) — even a 0.4V difference matters
- Capacity in Wh or mAh (higher is fine; lower means shorter runtime)
- Cell type: Li-ion or Li-polymer
- Connector shape and pin count
Lenovo’s battery documentation notes that battery lifespan typically runs 2–5 years or 300–500 charge cycles, and that replacement complexity varies significantly by model. That variation is exactly why part-number matching beats guessing from capacity alone.
Pro Tip: Photograph the battery label and the connector before you remove anything. If you’re ordering online, that photo is your reference when a listing’s compatibility table is vague or wrong.
Manufacturer support pages from HP, Dell, and Lenovo each have battery finder tools that cross-reference your model number to a specific part. Use them. Third-party cross-reference databases are useful as a secondary check, not a primary one.
Where can you buy a replacement battery in the U.S.?
Trusted U.S. channels include manufacturer parts stores (Dell, HP, Lenovo all sell direct), national retailers like Micro Center and Amazon, specialist battery resellers like BatteryMart and BatteryClerk, and certified repair shops such as Kronnos-technology that source parts for you. Each has trade-offs.
Micro Center stocks batteries in-store for common laptop models, which means you can walk out same-day. That matters when your laptop is your work machine. Amazon has the widest selection but also the most counterfeit risk, so filter by “Ships from and sold by Amazon” or buy directly from the manufacturer’s Amazon storefront. BatteryMart and BatteryClerk specialize in replacement batteries and typically publish part-number cross-references and compatibility notes that general retailers skip. iFixit sells batteries bundled with the tools you need and provides free repair guides for hundreds of models, which is a genuine convenience if you’re doing the swap yourself.
What to check on every listing before you buy: exact part-number match, UL or CE safety certification stated explicitly, a clear return policy (at least 30 days), seller reviews that mention correct fit and runtime, and a U.S. contact address or phone number. If any of those are missing, keep scrolling.
Red flags that should stop you cold:
- Compatibility described only as “fits most HP laptops” with no part number
- Pricing dramatically below comparable OEM or reputable aftermarket options
- No warranty stated, or a warranty with no claims process described
- Seller account created recently with few reviews
- No safety certifications listed anywhere in the listing
In-store purchase from a retailer like Micro Center or a repair shop like Kronnos-technology changes the equation: you get same-day availability, a technician can verify the part before installation, and returns are straightforward. The convenience premium is usually worth it for internal battery replacements where a wrong part means disassembling the laptop twice.

OEM vs. aftermarket batteries: which should you choose?
The honest answer is that both can work well, and both can fail badly. The difference is in how you vet the source.
| Factor | OEM Battery | Reputable Aftermarket |
|---|---|---|
| Price | Higher (around $60 typical) | Lower (around $25 typical) |
| Compatibility | Guaranteed by part number | Verify via cross-reference |
| Capacity (mAh/Wh) | Matches original spec | Sometimes higher capacity available |
| Warranty / return | Manufacturer warranty, clear RMA | Varies; look for 12-month minimum |
| Cell type / certifications | Li-ion or Li-polymer, UL/CE | Check listing explicitly for UL/CE |
| Availability / shipping | Direct from OEM or authorized reseller | Widely available; U.S. stock preferred |
OEM is the right call when your laptop is still under warranty (an aftermarket battery can complicate warranty claims), when the model has known compatibility sensitivity, or when you simply want zero ambiguity. HP’s guidance points users to the HP Parts Store and authorized partners specifically because compatibility and safety certification are guaranteed there.
A reputable aftermarket battery is reasonable when the laptop is out of warranty, OEM parts are discontinued or priced at a significant premium, and the aftermarket seller publishes UL or CE certification data, has a clear U.S. return policy, and ships from domestic stock. The word “reputable” is doing real work in that sentence. An unknown brand on a marketplace with no certifications listed is not a reputable aftermarket battery; it’s a gamble.
Pro Tip: Prefer aftermarket sellers that publish test data, list the specific cell manufacturer, and offer at least a one-year warranty with a documented return process. Ships-from-U.S. stock means faster delivery and easier returns if something’s wrong.
How much does a replacement battery cost, and how long will it take?
Cost varies by laptop category, OEM vs. aftermarket, and whether you’re paying for labor. Typical price ranges reflect these differences, but actual costs vary by model, seller, and availability.
A few things drive cost beyond the category label:
- Capacity: a higher-Wh replacement costs more, but the runtime gain can be worth it.
- OEM branding: you’re paying for guaranteed compatibility and the manufacturer’s warranty, not just the cells.
- Labor for internal batteries: shops charge more for models with glued or heat-bonded packs because disassembly takes longer. iFixit’s repair guides rate repairability by model, and a low score usually predicts a higher labor quote.
- Shipping vs. in-store: ordering online saves money but adds 2–5 business days. In-store at Micro Center or a repair shop like Kronnos-technology means same-day or next-day turnaround.
Mail-in repair services typically add 5–10 business days round-trip, which is a real cost if the laptop is your primary work machine.
Can you replace a laptop battery yourself? A quick decision checklist
Work through these questions before you commit to DIY.
The rule: if you answer “no” to any of the safety-critical items below, stop and book a professional. A $60 battery isn’t worth a $400 motherboard repair.
Go ahead with DIY if:
- The battery is externally removable (slides out or releases with a latch)
- You have the exact part number confirmed
- Your laptop is out of warranty, or you’ve confirmed DIY won’t void it
- You have the required tools (screwdriver, plastic spudger for internal)
- You have basic ESD awareness (antistatic mat or wrist strap for internal work)
Stop and call a pro if:
- The battery is internal and glued or heat-bonded
- The battery is visibly swollen (bulging case, trackpad lifting, screen gap)
- You can’t find a model-specific disassembly guide
- The laptop is still under manufacturer warranty
- You’re not comfortable working around fragile ribbon cables and board connectors
A swollen battery is a specific emergency. Do not compress it, puncture it, or try to force it out. Place the laptop on a non-flammable surface, stop using it, and get it to a technician or recycler promptly.
Pro Tip: Run powercfg /batteryreport on Windows before ordering anything. If full charge capacity is still above 60% of design capacity, the battery may not be the problem. Ruling out software or calibration issues first saves you money.
Step-by-step: replacing a removable laptop battery safely
Removable batteries are the easy case. The whole process takes about five minutes once you have the right part.
Before you start:
- Back up your data.
- Save and close all open files.
- Shut down completely (not sleep or hibernate).
- Unplug the power adapter and all peripherals.
- Place the laptop on a soft, clean surface, keyboard-side down.
What you’ll need:
- Replacement battery (part-number confirmed)
- Small Phillips screwdriver (if the battery compartment has a retention screw)
- Microfiber cloth (to protect the lid surface)
- Antistatic mat (optional but good practice)
Replacement steps:
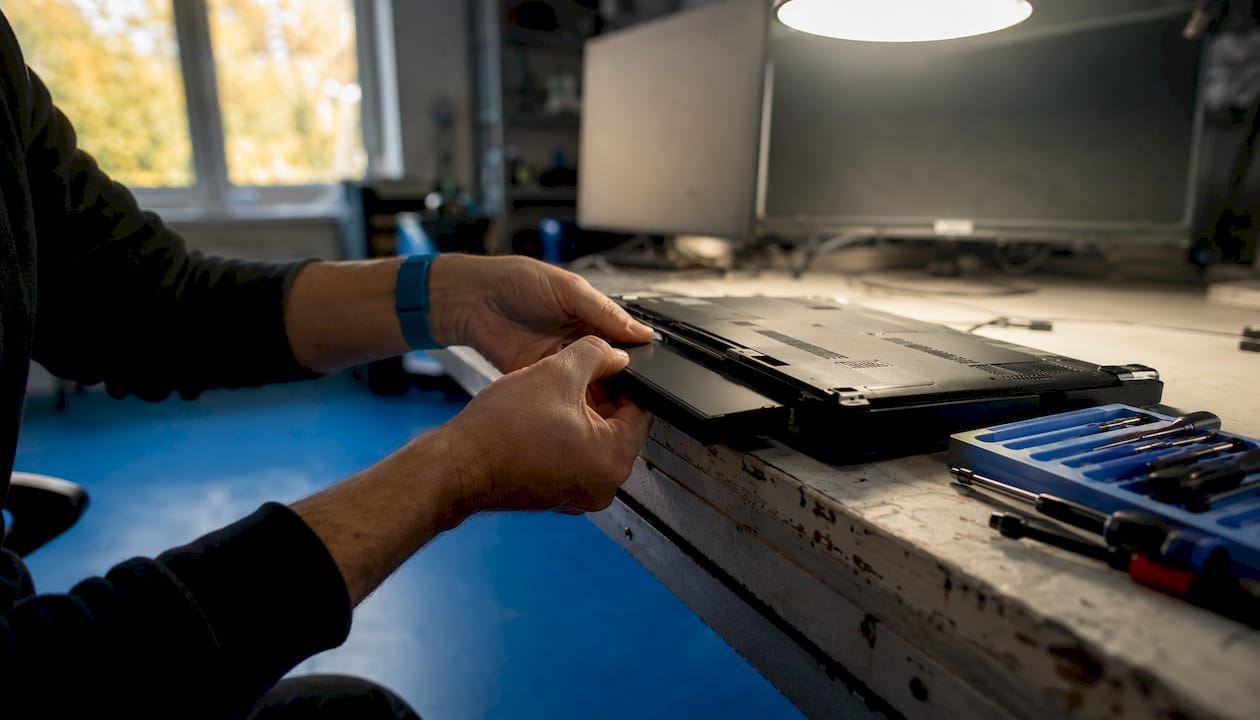
- Locate the battery release latch or latches on the underside. Most removable batteries use one or two sliding latches.
- Slide the latch(es) to the unlock position and hold.
- Lift the battery pack straight out of the compartment. Do not twist or pry.
- Set the old battery aside on a non-conductive surface.
- Align the new battery with the compartment guides and press it firmly until the latch clicks into place.
- Reconnect the power adapter and power on.
- Let the battery charge to 100% before unplugging for the first time.
- After the first full charge, run the laptop on battery until it shuts down, then charge to 100% again. This initial calibration cycle helps the system report capacity accurately.
Safety notes: never use a metal tool to pry a battery pack. If the battery doesn’t seat easily, check alignment before forcing it. After the first charge, verify the system recognizes the capacity appropriately in your battery health report.
Step-by-step: replacing an internal laptop battery
Internal battery replacement is a different category of task. The procedure below is a general framework; always find your model’s specific disassembly guide from the manufacturer before you start. Dell’s support video library covers many Latitude and Inspiron models. HP’s Tech Takes guide walks through the process for HP notebooks. The Framework laptop’s Battery Replacement Guide is one of the clearest examples of what good manufacturer documentation looks like.
HP’s official guidance recommends professional technician service for many internal battery replacements, because electrostatic discharge and fragile board connectors can cause motherboard damage. That’s not boilerplate. It’s the reason shops charge more for this job.
Pre-checks:
- Confirm the exact part number and verify compatibility against your model’s service manual.
- Run battery diagnostics to confirm the battery is actually the failing component.
- Check your warranty terms. Opening the case can void coverage on some models.
Tools you’ll need:
- Precision screwdriver set (Phillips and Torx heads)
- Plastic spudgers (never metal for prying panels)
- ESD wrist strap
- Magnetic parts tray
- Bright light or headlamp
High-level procedure:
- Power off completely and unplug. Remove any SD cards or USB dongles.
- Place the laptop upside down on a soft surface.
- Remove back-panel screws. Note that screw lengths often vary by position; a magnetic tray with a diagram prevents mix-ups.
- Use a plastic spudger to release the panel clips around the perimeter. Work slowly; forcing a clip breaks it.
- Disconnect the battery connector before touching anything else on the board. Accidental shorting of the board is the most common cause of post-repair failures.
- Remove any screws securing the battery pack to the chassis.
- For glued or heat-bonded batteries: apply gentle warmth (a warm, not hot, surface) to soften adhesive, then use a spudger to carefully separate the pack. Never puncture the cells.
- Install the new battery, reconnect the connector (check that pins are straight before seating), and replace securing screws.
- Reseat the back panel, replace screws in reverse order, and power on.
- Charge to 100% and run a battery health report to confirm capacity is reporting correctly.
Pro Tip: Check the connector pins on the board before plugging the new battery in. Bent pins are a common cause of “battery not detected” errors after a DIY internal replacement, and straightening them requires a steady hand and magnification.
Why a pro may be the better choice here: complex disassembly, adhesive-bonded packs, and the proximity of the battery connector to the motherboard all raise the risk of collateral damage. Shops like Kronnos-technology run a post-repair stress test, monitoring temperature and battery discharge under CPU load, because a simple runtime check doesn’t catch every failure mode.
Battery safety, disposal, and recycling in the U.S.
Old laptop batteries are hazardous waste. Putting one in the household trash is illegal in most U.S. states and genuinely dangerous.
Safe handling rules:
- Never puncture, crush, or incinerate a lithium battery.
- Store old batteries in a cool, dry location, away from metal objects, until you can drop them off.
- If a battery is swollen, place it in a fireproof container or bag and prioritize disposal immediately.
- Tape the terminals with electrical tape before transport to prevent accidental short circuits.
- Place each battery in its own plastic bag before putting it with other items.
U.S. disposal options:
- Call2Recycle: the largest U.S. battery recycling network, with drop-off locations at major retailers including Home Depot, Lowe’s, and Staples. Visit Call2Recycle’s site to find the nearest location.
- Retailer takeback: Best Buy, Staples, and some Micro Center locations accept used laptop batteries at no charge.
- Municipal hazardous-waste facilities: most counties run periodic collection events or permanent drop-off sites. Check your county’s public works or environmental services website.
- Manufacturer takeback: Dell, HP, and Lenovo each run recycling programs for their own products.
Never ship a lithium battery without checking carrier regulations. USPS, FedEx, and UPS each have specific packaging and labeling requirements for lithium batteries.
How to check battery health and recalibrate after replacement
Checking battery health before you buy a replacement confirms the battery is actually the problem. Checking it after replacement confirms the new pack is reporting correctly.
Windows battery report:
Open Command Prompt as administrator and run powercfg /batteryreport. Windows saves an HTML file to your user folder. The two numbers that matter are Design Capacity (what the battery was built to hold) and Full Charge Capacity (what it holds now). A full charge capacity below 60–70% of design capacity is a clear signal the battery needs replacing.
macOS battery status:
Hold Option, click the Apple menu, and go to System Information > Power. You’ll see cycle count and a condition label (Normal, Replace Soon, Replace Now, or Service Battery). Apple considers a battery at end of life when it reaches its maximum cycle count, which varies by model.
| Check | Windows method | macOS method |
|---|---|---|
| Design vs. full charge capacity | powercfg /batteryreport | System Information > Power |
| Cycle count | Battery report HTML file | System Information > Power |
| Condition label | Not shown natively | Normal / Replace Soon / Replace Now |
| Post-replacement verification | Re-run battery report after first full charge | Re-check System Information after first charge |
Recalibration after replacement:
Charge the new battery to 100%, then use the laptop normally until it shuts down from low battery. Charge back to 100% without interruption. This cycle lets the system firmware learn the new battery’s actual capacity range and report it accurately. Lenovo’s battery documentation notes that some OEMs also provide dedicated battery diagnostic tools that can confirm capacity decline before you commit to a purchase.
Post-replacement monitoring: watch for unexpected shutdowns, excessive heat near the battery area, or a charge percentage that jumps erratically. Any of those symptoms after a new battery installation warrant a return to the seller or a visit to a technician.
Warranty, returns, and red flags when buying a battery
Replacing a battery yourself can affect your device warranty. On some models, opening the case voids coverage for unrelated issues, not just the battery itself. Check your specific warranty terms before you start. HP’s warranty documentation makes this explicit, and it’s worth a five-minute read before you commit.
What to expect from a seller’s warranty:
- Reputable sellers offer at least a 12-month warranty on the battery itself.
- A money-back guarantee of 30 days or more is standard for legitimate retailers.
- The return process (RMA) should be clearly described, not buried in fine print.
- Warranty coverage should state what it covers: manufacturing defects, capacity loss below a threshold, or both.
Red-flag checklist for any battery listing:
- No part number listed, only a vague model compatibility claim
- Capacity specs that seem impossibly high for the physical size of the battery
- No UL or CE certification mentioned anywhere
- Reviews that mention overheating, swelling within weeks, or incorrect fit
- No U.S. contact information for the seller
If you receive a swollen or visibly damaged battery: do not install it. Do not try to return it by standard mail without checking carrier hazmat rules. Contact the seller immediately for a replacement or refund, and take the damaged unit to a Call2Recycle drop-off or local hazardous-waste facility.
The UL certification mark on a battery listing means the cells and protection circuit have been independently tested for safety. CE marking indicates compliance with European safety standards and is common on batteries sold in the U.S. market. Neither is a guarantee of performance, but their absence on a lithium battery listing is a genuine warning sign.
When should you book a certified repair vs. do it yourself?
The decision comes down to battery type, your comfort level, and what’s at stake if something goes wrong.
DIY makes sense when:
- The battery slides out from the outside with no tools required.
- You have the exact part number confirmed and a reputable U.S. seller.
- The laptop is out of warranty and you have basic tool experience.
- A model-specific guide exists from the manufacturer or iFixit.
Professional service makes sense when:
- The battery is internal, glued, or soldered.
- The laptop is still under manufacturer warranty.
- The battery is swollen.
- You can’t find a model-specific disassembly guide.
- The laptop has had previous repair work that may have changed the internal layout.
Kronnos-technology’s recommendation: when in doubt, get a diagnostic first. A technician can confirm whether the battery is the actual problem, check for swelling or connector damage, and give you a clear quote before any work begins. That’s a better starting point than ordering a part and discovering the issue is elsewhere.
Kronnos-technology uses OEM-equivalent or genuine parts, performs a post-repair stress test on every battery replacement, and handles safe disposal of the old battery. Transparent pricing means you know the cost before the technician starts. For complex internal replacements, that combination of expertise and accountability is worth more than the DIY savings.
Pro Tip: Ask any repair shop whether they run a post-repair stress test. A shop that only checks the charge percentage and hands the laptop back is skipping the step that catches thermal and discharge issues under real load.
Key Takeaways
A laptop battery replacement done right starts with the correct part number, not the cheapest listing. DIY is safe for removable batteries; most internal replacements belong with a certified technician.
| Point | Details |
|---|---|
| Identify before you buy | Match part number, voltage, Wh/mAh, and connector shape before ordering any replacement. |
| DIY vs. pro decision | Removable batteries are user-replaceable; internal, glued, or swollen batteries need a technician. |
| Check health first | Run powercfg /batteryreport (Windows) or System Information > Power (macOS) to confirm the battery is the actual problem. |
| Dispose safely | Use Call2Recycle, retailer takeback, or a municipal hazardous-waste facility. Never put lithium batteries in household trash. |
| Kronnos-technology | For internal or complex replacements, Kronnos-technology offers diagnostic checks, OEM-equivalent parts, post-repair stress testing, and safe battery recycling. |
The part most people skip (and why it matters)
The single most common mistake in a DIY battery replacement isn’t a wrong part or a stripped screw. It’s skipping the battery health report before ordering. A laptop that dies after 45 minutes might have a failing battery, or it might have a power-hungry background process, a miscalibrated charge curve, or a failing charging circuit. Ordering a battery without running powercfg /batteryreport first means you might install a new pack and see no improvement.
The second mistake is underestimating connector fragility on internal replacements. Technicians see this constantly: a DIYer gets the back panel off cleanly, removes the battery screws correctly, and then tears the battery connector off the board trying to unplug it. That one moment turns a $60 battery job into a motherboard repair. The connector disconnects by sliding straight down, not by pulling upward or at an angle, and it requires less force than most people expect.
There’s also a category of customer who buys the cheapest listing on a marketplace, gets a battery with no certifications and a vague compatibility claim, installs it, and then wonders why it runs hot and loses 20% capacity in three months. The price difference between a no-name listing and a reputable aftermarket battery with UL certification is often $15–$25. That gap is not where to cut corners on a device you use every day.
If you’re uncertain about any step, bring the laptop in. A diagnostic check costs less than a motherboard repair, and a good technician will tell you honestly whether DIY is realistic for your specific model.
Skip the guesswork: Kronnos-technology handles battery replacement for you
Buying the right battery, sourcing tools, and disassembling a laptop with a glued internal pack takes time and carries real risk if something goes wrong. Kronnos-technology offers a faster, lower-risk path: bring in your device, get a diagnostic check that confirms the battery is the actual problem, and have a certified technician install an OEM-equivalent or genuine replacement part the same day.

Every battery replacement at Kronnos-technology includes safe disposal of the old battery, a post-repair stress test under real load, and a warranty on the work. Pricing is transparent before the job starts. No surprises, no mail-in wait times, no risk of connector damage from a first-time disassembly. For internal batteries on ultrabooks, gaming laptops, or any model with a glued pack, that combination of speed and accountability is hard to match with a DIY approach.
Ready to get your laptop running at full capacity again? Book a battery replacement with Kronnos-technology or visit the Kronnos-technology homepage to learn more about available services and pricing.
Useful sources and manufacturer resources
The references below are the authoritative sources used throughout this guide. Bookmark the ones relevant to your laptop brand.
| Resource | What it covers |
|---|---|
| HP Battery Replacement (HP Store) | HP’s official guidance on internal battery replacement and authorized service options |
| HP Tech Takes: Battery Replacement Guide | Step-by-step HP battery replacement with diagnostic and pre-check instructions |
| Dell Laptop Battery Replacement (Video) | Model-specific Dell replacement video library |
| Lenovo Battery Glossary | Battery lifespan, cycle counts, and model-dependent replacement complexity |
| Framework Battery Replacement Guide | Detailed step-by-step guide for Framework Laptop battery replacement |
| Call2Recycle (call2recycle.org) | U.S. battery recycling drop-off locator |
| County hazardous-waste programs | Check your county’s public works site for local drop-off schedules |
| Kronnos-technology Services | Professional battery replacement, diagnostics, and repair plans |
A note on manufacturer guidance: HP and Lenovo both publish explicit recommendations to use professional service for internal battery replacements. That guidance exists because the risk of ESD damage and connector failure is real, not because the manufacturers want to sell service contracts. Read the OEM documentation for your specific model before you start any disassembly.